
Say Hello to Instant Proofing for Perfect Bound Booklets
Sick of endless email chains and delays just to approve your booklet proof? Same here!
That’s why we’ve launched something big: instant web proofing for Perfect Bound Booklets – a UK first and the most advanced tool on the market.
It’s fast. It’s easy. It’s 100% in your control.
Upload your artwork, preview your booklet digitally, and approve it in minutes – all before you check out. No chasing. No waiting. No stress. Just how online print should be.
Why This Changes the Game
Gone are the days of waiting for someone to send your proof post-purchase. Now, it’s all upfront, so you can place your order and keep things moving.
Here’s what makes it so powerful:
-
Faster turnaround – Upload and approve in one go. Perfect for tight deadlines.
-
Total control – You're the boss. Review, tweak and approve your own proof, just like our other self serve products.
-
More flexibility – Need to swap your artwork? No drama. Just upload a new version through your account, as long as that hasn’t gone to print.
-
Great for teams – Share your live proof with colleagues or clients for a quicker sign-off.
-
Less faff – Ditch the emails and do it all in a smooth, streamlined journey.
-
Templates, Sorted – No need to wrestle with dimensions or bleed. Our on page template generator builds the perfect layout based on your specs so you can design with confidence, knowing everything’s set up just right.
You get full freedom without losing support – our team is always on hand if you need help.
How to Upload Your Perfect Bound Booklet – Step by Step
Ready to get started? Here’s how to upload and proof your booklet like a pro.
Step 1: Head to the Product Page
Start at our Perfect Bound Booklets Catagory Page – this is where the magic happens, you'll find our extensive offering of Perfect Bound Books here.
Step 2: Choose Your Specs
Pick your booklet size, number of pages, finishes – whatever fits your vibe. When you're happy, click ‘Add to Basket’ and then select 'Upload a Complete Design'.
Step 3: Upload Your Artwork
Time to bring your design to life. Before you upload, here’s what we need:
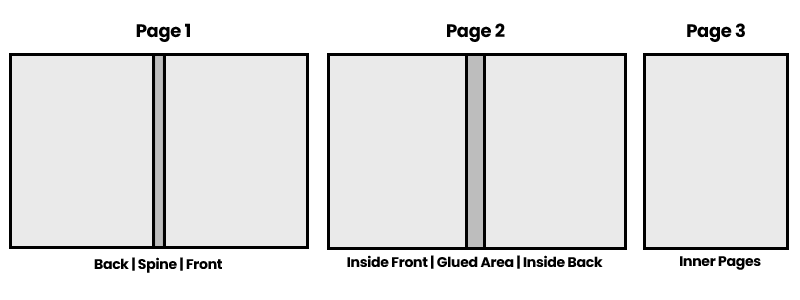
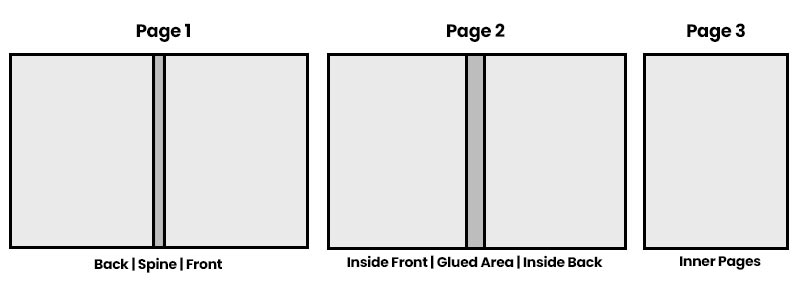
Option 1 - Traditional Method with cover spreads
-
Page 1: A spread of your front and back cover – make sure to include your spine if you want one, otherwise it will be white as default.
-
Page 2: Your inner cover (left and right).
-
Pages 3 onwards: All your inside pages, in normal reading order.
Step 4: Check Your Flipbook Preview
Once uploaded, you’ll get a full digital preview of your booklet – complete with a checklist to flag you. any issues. If something’s off, just hit ‘My Proof is Wrong’ and our team will assist.
When reviewing the inside pages of your proof, the blue line indicates where the EVA glue will be applied to your book – this line won’t be printed.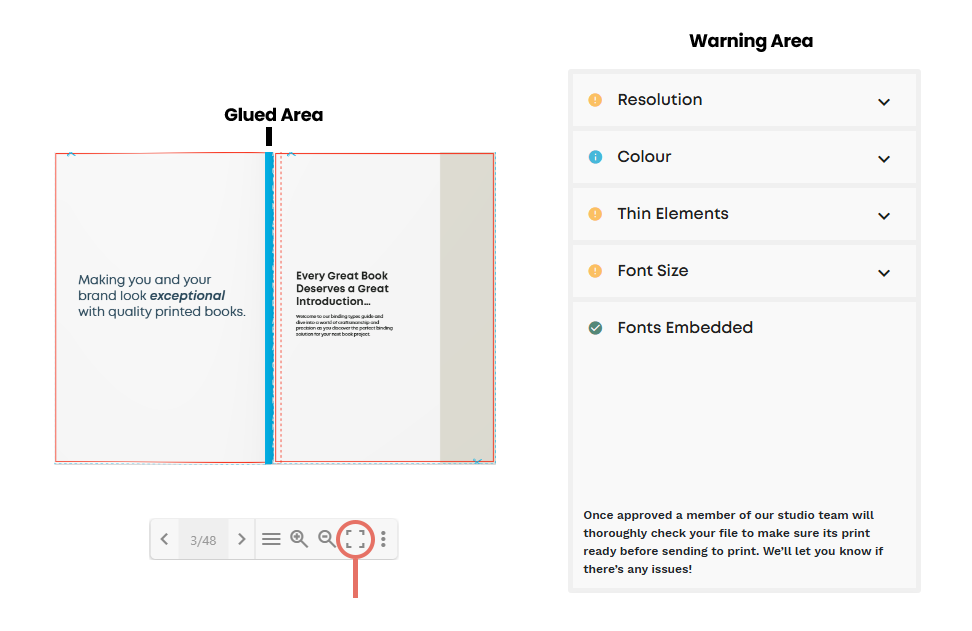
Pro Tip: Taking your proofing experience full screen for the best proofing experience
Step 5: Approve and Checkout
If everything looks spot on, click ‘Approve and send for final check.’ You’ll head to your basket where your proof and delivery date are waiting. Then it’s on to payment - and we’ll take it from there.
And that’s it, simple as can be! Enjoy the smoother, more straightforward proofing process, and don’t hesitate to reach out if you need anything.


