
Getting your artwork ready might sound like a chore, but we’ve made it easier than ever, no jargon, no stress, just a few simple steps. Whether you’ve got a design ready to roll or you’re still adding the finishing touches, uploading your artwork with us is quick, flexible, and totally fuss free.
You can either upload your file during checkout (pre-purchase) or later through your account (post-purchase) - whatever works best for you. This handy guide walks you through both routes, explains how our clever automatic checks work, and shows you exactly how to approve your proof like a pro. Let’s get that print looking perfect.
Our Step-by-Step Guide to Uploading Artwork During Checkout (Pre-Purchase)
Got your design ready to go? Uploading it at checkout is a convenient option if you want to get everything sorted in one go.
Here’s how it works:
1. Choose Your Product
Pick your print (e.g. flyers, booklets, business cards), then select your size, stock, quantity, and finish.
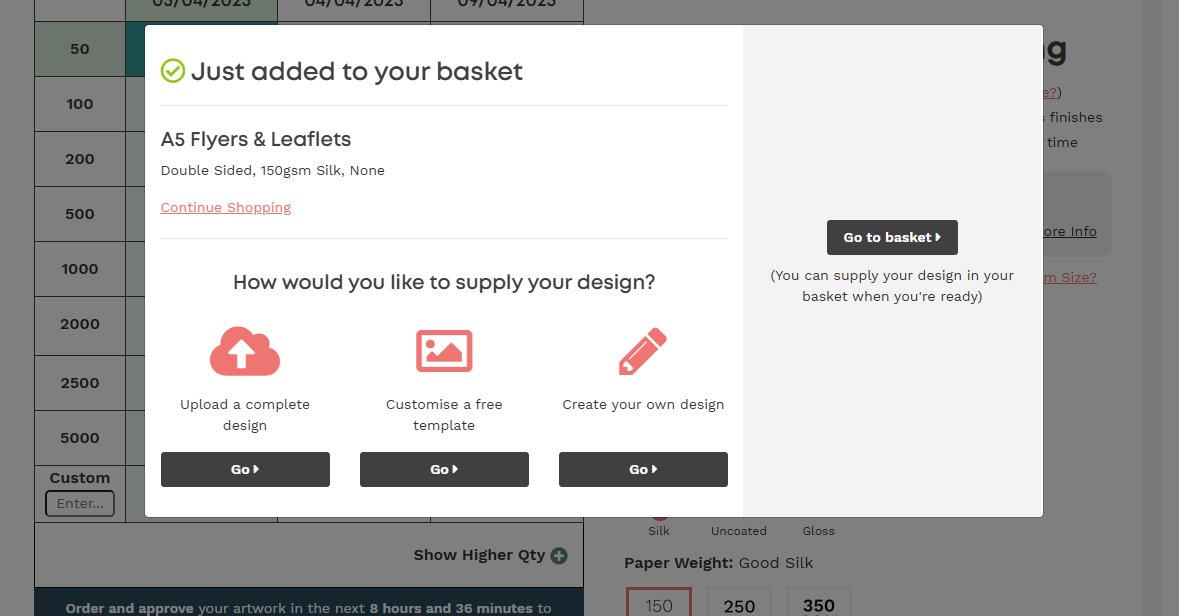
2. Decide How to Supply Artwork
You’ll see three options:
• Upload your own design
• Create your own using our online design tool
• Customise a ready-made template
Click Go under your preferred option to continue.
3. Upload your file
We accept the following file types: PDF, JPEG, PNG, TIFF, EPS, AI, DOC, DOCX, PUB, and PPTX.
For the best print results, we recommend uploading your design as a PDF or JPEG.
You can upload your file your way:
• A single file with all sides/pages
• Separate files for front and back
• Individual pages
4. Automatic Checks
Once uploaded, we’ll run a few quick checks to make sure your design is print perfect:
• Resize artwork to fit the print area (if needed)
• Convert colours to CMYK for accurate print output
• Check the resolution to avoid blurriness — and if it’s too low, we’ll offer to enhance it using our new AI tool
• Confirm bleed is included

4. Check your proof –
You’ll get a digital proof showing exactly how your final print will look. This is your chance to make sure everything is spot on - layout, colour, text placement - before you hit print.
5. Approve for print –
Happy with how it looks? Tick the approval box to proceed to checkout and we’ll take it from there.
How To Upload Your Artwork During Checkout Tutorial
Watch our step-by-step video guide to see exactly how to upload and proof your artwork during checkout. From selecting your product to final approval, we’ll show you just how quick and easy it is to get your print job moving.
Having Trouble Uploading Your Artwork?
If you're having a few hiccups uploading your artwork – no worries! Our friendly in-house artwork team is here to help. You can email your design over instead, and we’ll take care of the rest.
Step 1:
Place your order as normal, but skip the artwork upload – just head straight through to checkout.
Step 2:
Once you've placed your order, you'll receive a web order reference number (this is in your confirmation email). Use that number as your email subject line and send your artwork to artwork@instantprint.co.uk.
File too big?
If your artwork file is over 20MB, you’ll need to send it via WeTransfer.com. Just upload your file, set the recipient as artwork@instantprint.co.uk, and pop your web order number in the message box. We’ll send a proof back for you to approve within two working hours.
Quick Artwork Checklist
Before sending your design, take a moment to double-check the essentials:
- Spelling & Details: Double-check names, dates, and contact info.
- Text Size: Zoom out to actual size to make sure everything’s easy to read.
- Image Quality: Use high-res images – avoid anything scanned or blurry.
Need help with resolution? Check out our image quality guide.
What We’ll Check for You
Our team gives every file a free 10-point check, including:
- File type
- Bleed setup
- Resolution
- Colour mode
- And more!
We’ll flag anything we can’t fix and guide you on what to do next.
Uploading Artwork After Ordering Via Your Account Post Purchase
Still perfecting your design? No problem. You can place your order now and upload your artwork later through your account.
1. Log in to My Account
You’ll find this at the top of the page.
2. Click My Orders
You’ll see a list of your recent orders. If your artwork’s still missing, we’ll flag it with an Action Required alert.
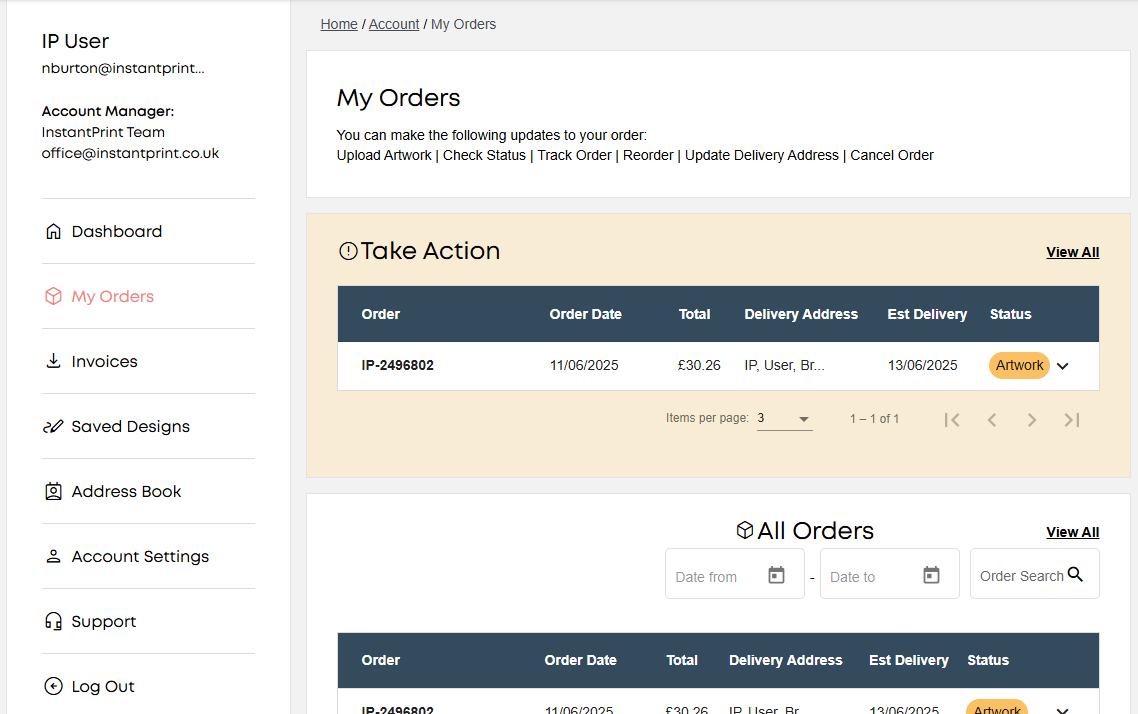
3. Upload Your File
Click Upload Artwork. We currently accept PDF and JPEG formats
4. Check your proof
Your design will go through the same checks as during checkout:
• CMYK colour conversion
• Resolution and bleed verification
• Sizing and alignment review
5. Approve for print
Once you're happy, click Approve and our expert team will give it a final check before sending it to print.
This option is ideal if you’re waiting on sign-off, still designing, or just want to lock in your order early.
How To Upload Your Artwork in Your Account Area Tutorial
Need to upload artwork after ordering? No worries! Check out our quick video showing how to upload your files via your account and get your design approved hassle-free.
Need a Hand?
If you’ve got any questions about uploading or setting up your artwork, our Studio Team is here to help. Just get in touch - we’re happy to guide you through it.


