Updated: September 2026
Ordering print online doesn’t need to be complicated. Whether you’re starting a business, preparing for an event or refreshing your marketing materials, this guide takes you through the process from choosing a product to approving your artwork.
If you need help at any point, ask Tobi, our live chat assistant. Tobi can recommend the right product, explain your options, check your artwork file before you send it to print and walk you through the ordering process.
How Does Online Printing Work?
Ordering print with instantprint can be broken down into four simple steps:
- Choose your product and print options.
- Upload your artwork or create a design online.
- Review and approve your digital proof.
- We check, print and dispatch your order.
Every artwork file receives a free 10-point check from our Studio team before it goes to print. We check technical details including the file type, size, bleed, resolution and colour setup.
If we spot something that could affect your finished print, we’ll let you know what needs changing. Once your artwork has been approved and passed our checks, we’ll send it to print.
Production and delivery times depend on the product and options you choose. Your estimated dispatch and delivery dates will be shown when you order.
How to Order Print with instantprint
1. Choose Your Product
Use Shop All Products to browse our full range, choose a category from the main navigation or search for a specific product.
Our range includes:
- Business cards
- Flyers and leaflets
- Books and booklets
- Stickers and labels
- Posters
- Banners
- Signs
- Roller banners
- Exhibition displays
- Business stationery
Each product page explains the available sizes, materials, finishes, quantities and delivery options.
Not sure what you need? Tell Tobi what you want your print to do and our live chat assistant can recommend suitable products and options.
2. Choose Your Print Options
The available options vary by product, but you may be asked to choose:
- Size – Select one of the available standard or custom sizes.
- Material or paper stock – This is what your product will be printed on. GSM means grams per square metre and describes the weight of paper or card. A higher GSM will usually feel heavier and more substantial.
- Printed sides – Choose whether your design is printed on one side or both sides.
- Lamination – A thin layer applied to the printed surface. Depending on the product, you may be able to choose matt, gloss or velvet lamination.
- Spot UV – A clear, slightly raised gloss applied to selected parts of your design, such as a logo, pattern or piece of text.
- Foiling – Metallic gold or silver foil used to highlight selected elements of your design.
- Printed pages – This is the number of designed pages rather than the number of physical sheets. For example, a folded greeting card normally has four printed pages.
- Cover material – Selected booklets allow you to choose a different material for the cover and inner pages.
- Quantity – Choose how many copies you need. The price will update as you change your options.
Some finishes and options are only available on selected products. Tobi can explain the differences and help you choose the most suitable combination.
3. Supply Your Artwork
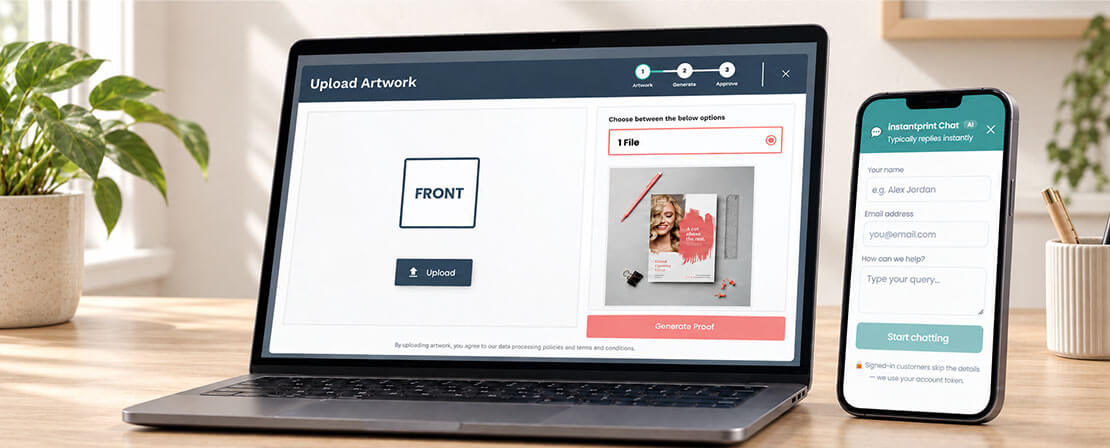
Once you’ve chosen your product and applied any customisation options to it that you want, the only thing left to do is add it to your basket and upload your artwork. Here’s how:
- Click Add to Basket.
- For most products, you’ll see a popup window asking how you’d like to supply your artwork.
- You can upload a design from your computer or customise/create your own with our free design tool.
- You can also continue shopping and add artwork to the basket later.
- Once you’ve added your artwork, we’ll send you a proof.
- Download the proof and view it through Adobe Reader or Acrobat.
- Click Approve if you’re happy with the final piece, or upload new artwork if you want to change it.
Check and Approve Your Proof
After you upload your artwork, our system will carry out a series of checks and generate a digital proof.
Your proof shows how your artwork will be positioned on the finished product. Before approving it, check:
- Spelling and contact details
- Image quality
- Page order
- Artwork positioning
- Anything close to the trim line
- The correct design is assigned to each side or page
If you’re happy with the proof, approve it to continue. If something doesn’t look right, upload a revised file or ask Tobi for help.
You can find more information in our artwork upload and proofing guide.
Our Free Artwork Check
Before your order goes to print, our Studio team will give your artwork a free 10-point check.
We check technical details that could affect production, including:
- Artwork size
- Bleed
- Resolution
- Colour setup
- File format
- Transparency
- Fonts and legibility
We’ll correct anything we safely can. If we find an issue that needs your input, we’ll let you know what needs changing.
Our checks cover the technical print setup, so you’re still responsible for checking the content of your design, including spelling, dates and contact information.
Uploading Artwork After Ordering
If your artwork isn’t ready, you can place your order and upload it later through your account:
- Sign in and open My Orders.
- Find the order marked Action Required.
- Select Upload Artwork.
- Upload your file.
- Review and approve your proof.
If you have trouble uploading your artwork or your file is too large, open live chat and ask Tobi. Tobi will help you find the best way to supply your file and complete your order.
When Will My Order Arrive?
Production and delivery times vary depending on the product, print options and delivery service you choose.
Your estimated dates will be shown when you configure your product and during checkout. These live dates are more accurate than a general delivery table because some products and options take longer to produce than others.
- Dispatch date is when your order is expected to leave our production facility.
- Delivery date is when your order is expected to arrive.
- Working days are Monday to Friday, excluding bank holidays.
Your production time begins once your order has been placed and your artwork has been approved. Approving your artwork after the displayed cut-off time may move your dispatch date to the following working day.
Selected products are available with express or next-working-day delivery. Check the live options and dates shown when ordering.
Need Help?
Ask Tobi, our live chat assistant, if you need help:
- Finding the right product
- Choosing your size, material or finish
- Checking your artwork before print
- Uploading your design
- Understanding your proof
- Completing your order
- Finding further support
Open live chat whenever you need a hand and Tobi will guide you through the next step.
.png)