Updated: January 2026
You might have heard the word ‘bleed’ or ‘bleed area’ on printing websites or being used by graphic designers, but what actually is it? Here, we’ll take a look at what bleed is, why it’s important in printing and how to create artwork for print with a bleed and safety area.
What is bleed in printing?
We print all of your artwork on large sheets – of paper, plastic, or whatever material you’ve chosen! – because it’s a quicker and cost-effective way to print lots and lots of different things.
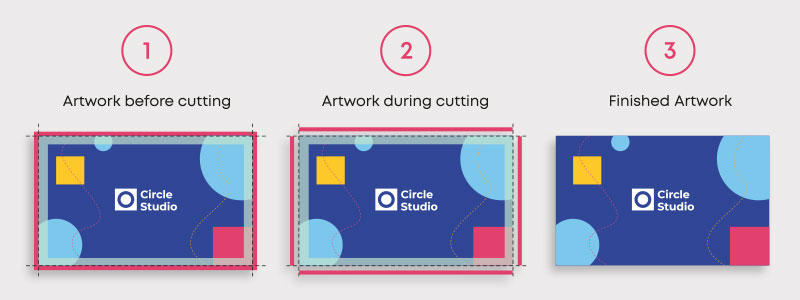
After printing, we trim them down to the right size using a guillotine, which looks like this:

Trimming isn’t always exact – sometimes it’s a mm here or there.
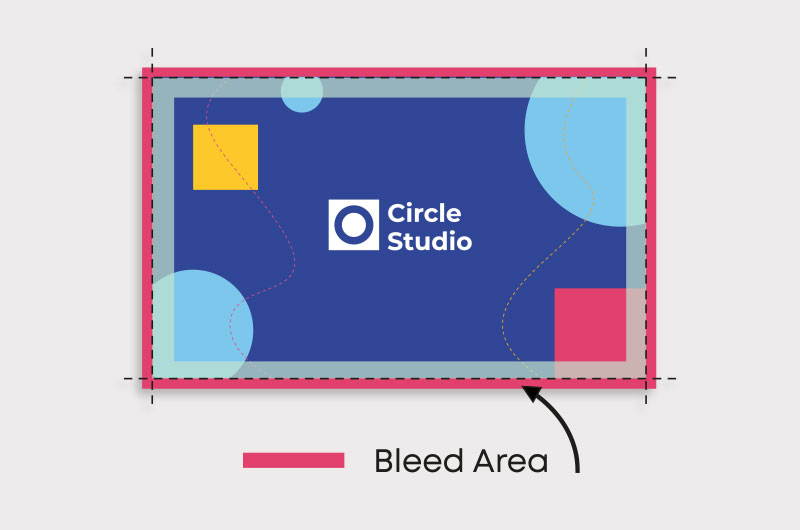
So, to make sure there are no thin white borders around your design after we’ve trimmed it, it’s a good idea to ‘bleed’ out the background of your artwork design to create a thin border around the edge of your design. This border is known as the bleed area and is usually around 3mm thick.
How thick should the bleed area be?
Bleed area is a different thickness depending on the print item you want, but is usually 3mm on each side of your design. For example, the standard business card size is 85mm x 55mm. With bleed, your artwork size will be 91mm x 61mm.
Choose the product you’d like on our website and you’ll be able to find the full size with bleed in the artwork section of the page.
What is the safe zone in printing?
While the bleed area is the 3mm border around the outside of your artwork to keep it looking neat and tidy after trimming, the safe zone refers to the 3mm area inside of the cut line.
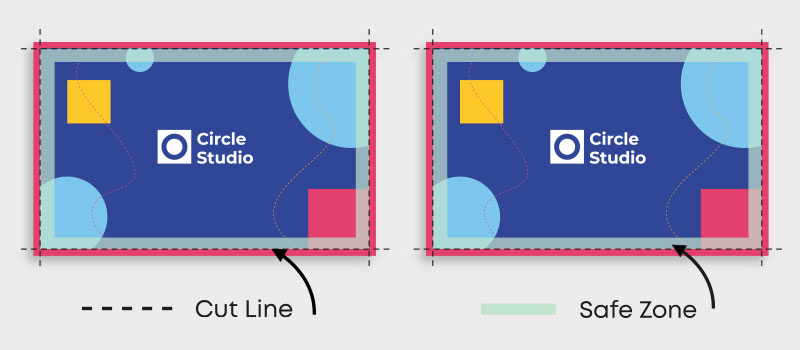
This zone is used to make sure any important information and graphics are far enough away from the cut line that they won’t get trimmed off with our guillotine. An easy way to do this? Just keep important stuff away from the edge of your design!
Again, this is something our team will check for before sending your artwork to print, so don’t worry if you’re not sure about this!
Free blank templates
A lot of our products have a blank template with the bleed and safe zones already worked out – these are free to download and design on to your heart’s content. You can find these on the product page of whichever product you want to print, or by getting in touch with our live chat team.
How to Add Bleed in Photoshop
Here’s a quick video guide we made on setting up bleed area using the popular design program Adobe Photoshop.