.jpg)
Custom cut print lets you move beyond standard shapes and create eye-catching flyers, stickers and signage that make a real impact. Whether you’re designing stickers, signage, or flyers, this guide will walk you through everything you need to know in a simple way.
What is CAD Cutting?
CAD cutting is the process of cutting printed sheets into any custom shape using a precision cutting blade guided by a laser.
This technology allows for unrivalled accuracy, making it possible to cut or crease both rigid and rolled materials to almost any final shape you can imagine.
Option 1: Auto Custom Cutter (The Easiest Way)
If you want a quick and simple setup, our Auto Custom Cutter does the hard work for you.
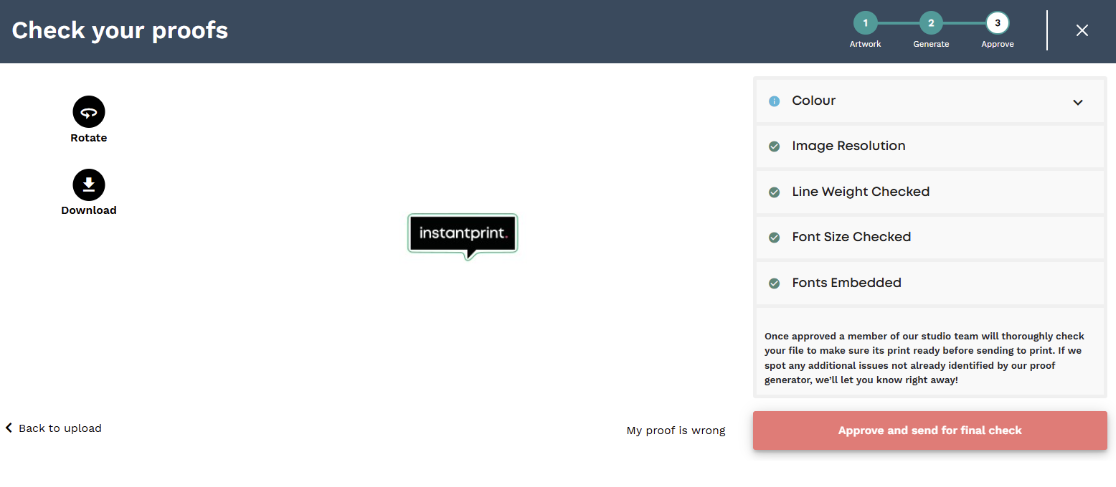
How it works:
-
Upload your artwork using our online proofing tool
-
The tool automatically generates a cutter line
-
Review and approve the cutter directly in the proof
-
Once approved, your artwork is ready for production
This option is perfect for straightforward shapes and saves time, no design software required.
What If the Auto Custom Cutter Doesn’t Work?
Create your own cutter using the steps below.
If you’re unsure or don’t have access to Illustrator, simply let the team know you’re unable to provide a custom cutter. Place your order without artwork, then email our studio team with your artwork and order reference number to studio@instantprint.co.uk. They’ll create one for you manually and send over a proof showing exactly how your product will be cut, so you can approve it before printing.
Option 2: Provide Your Own Custom Cutter
If your artwork is more complex, or you want full control over how your product is cut, you can supply your own custom cutter.
Step By Step Using Adobe Illustrator: Creating Your Own Custom Cutter
1. Open Adobe Illustrator (AI)
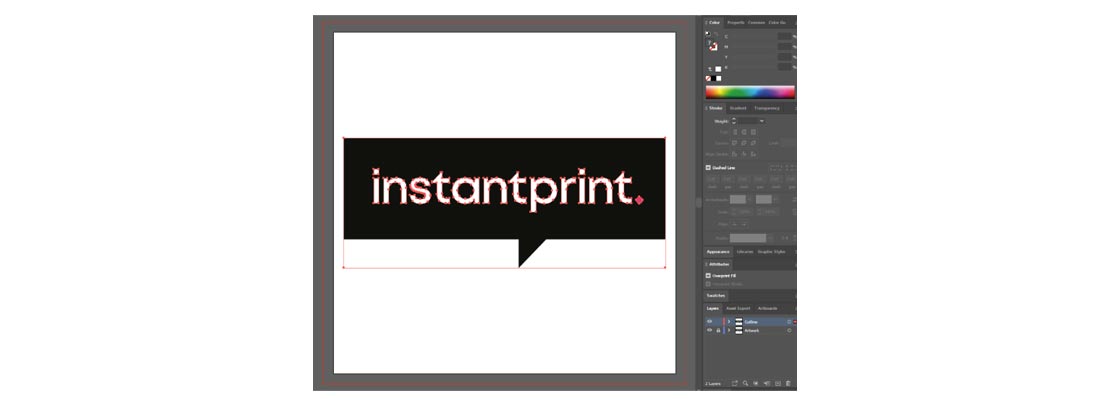
2. Place your artwork into the file and scale it up to the safety area (3mm inside the edge of the print)
3. Select the artwork and copy it
4. Create a new layer and name it “Cutter”
5. Lock the original artwork layer
6. Paste the artwork in place onto the Cutter layer
7. Delete any clipping masks if required
8. Select all content you’ve just pasted
9. If the artwork is raster-based, image trace first
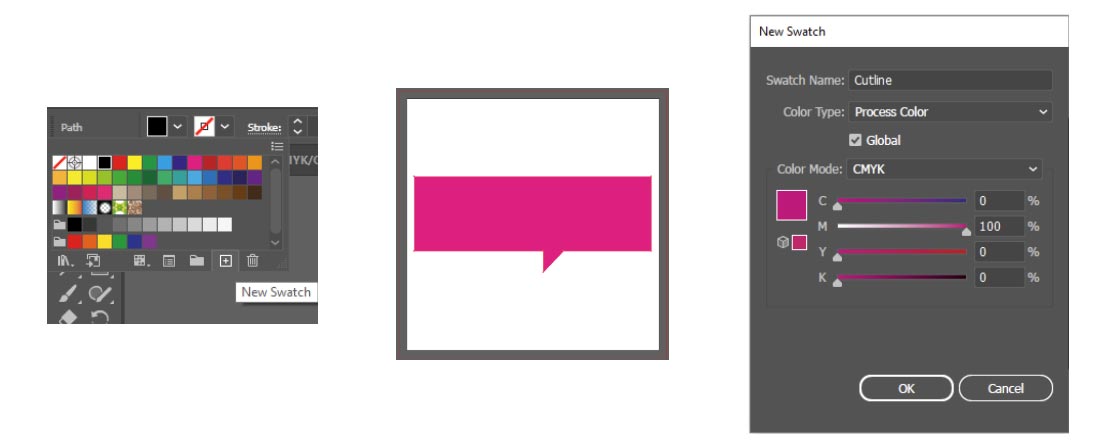
10. Set the colour values to:
C: 0, M: 100, Y: 0, K: 0
11. Create and name the swatch “Cutline”
This must be a Process colour (not Spot)
12. Select the shape - Go to Object > Path > Offset Path
13. Enter the offset values as required - This expands the shape to create the cut line
14. Change the fill to a stroke
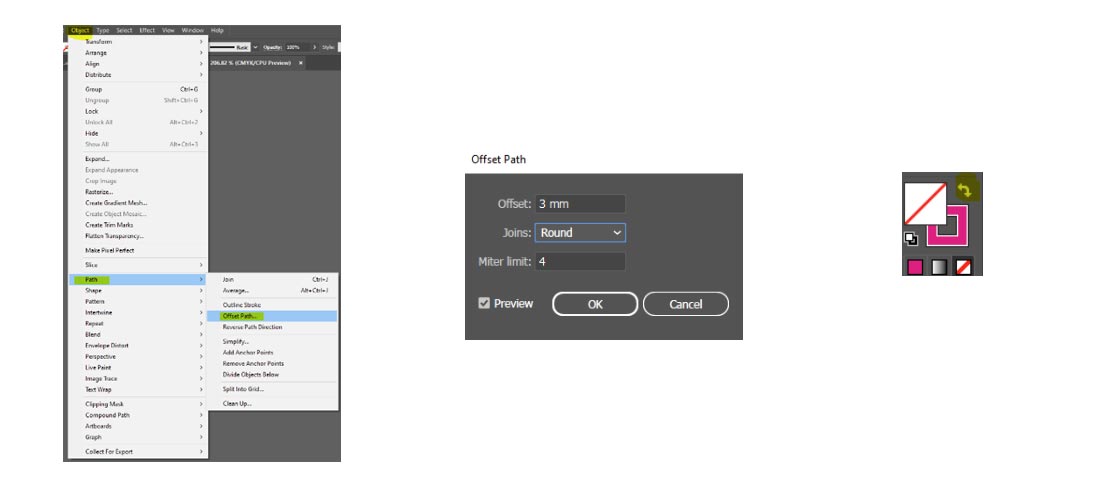
15. Select the inner shape and delete it, leaving only the stroke
16. Your cutter should now look like the example shown

Final check:
-
Review all sharp points and corners
-
These should be rounded, unless sharp points are specifically wanted.
⚠️ Important:
Sharp points increase the risk of tearing. If sharp corners are required, make sure the customer is aware of this risk.
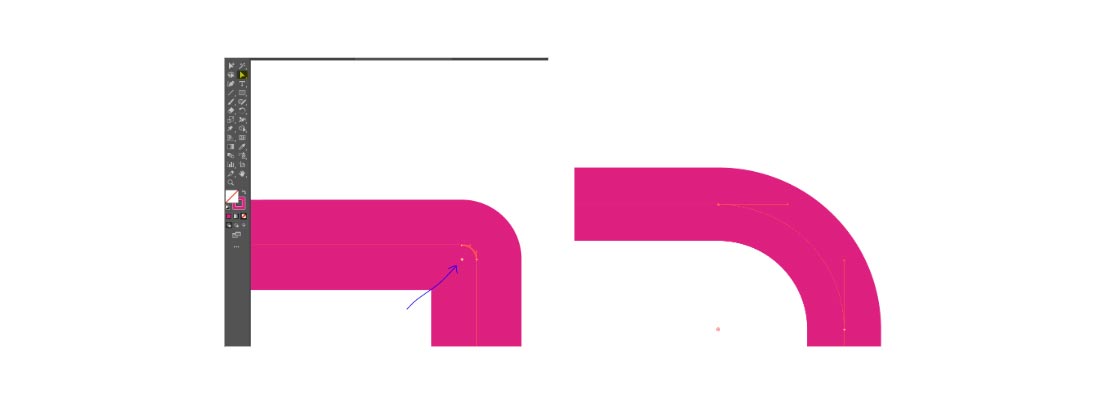
Adjusting Corners Manually
If you need to refine the cutter further:
-
Use the Selection Tool to drag anchor points and adjust corners
-
Or use the Direct Selection Tool to select the stroke
-
Then use the Pen Tool to move or refine anchor points
This allows for precise control over how the final product will be cut.
Need a Hand?
You can use a number of third-party tools to create your artwork. Popular ones include Microsoft Word, Adobe Illustrator and Canva, but as long as you can set the size of the document up and save as a PDF, any design tool is fine.
Check out our beginner’s guide to creating artwork for print to learn the basics.
Our team is always here to help. Whether you’re uploading artwork, creating a cutter, or just want reassurance before placing your order, we’ve got you covered. Place your order without artwork, then email our studio team with your artwork and order reference number to studio@instantprint.co.uk


