Updated: 10 May 2023
Folded leaflets and high quality sales brochures are a highly effective way of marketing your business. But if you’re not a trained graphic design, knowing how to set up the different folds for your leaflet design can seem tricky.
As a small business, you might not always have the budget to invest in a professional. But that doesn’t mean you can’t create a brochure from scratch to a professional standard! Here’s exactly how to design a folded leaflet in Word.
1. Set Up the Document
The key to designing a folded flyer or leaflet is – yup, you guessed it – the folds. Here’s how to set up your document to include the folds.
• Open a new blank Word document
• Go to Insert > Blank Page*
• Go to the Page Layout tab, then select Page Setup and open the dialog box

• Change Orientation to Landscape and choose the size of Paper you want, then close the dialog box


• Go to Layout > Columns and pick either two or three columns depending on whether you want to design a tri fold or bi fold leaflet

*You’ll need a page for each side of your folded leaflet to make it double sided
Using Free Templates
An alternative to starting from scratch with a blank document is to use a free brochure template. To do this open Microsoft Word and type ‘Brochures’ into the search bar at the top of the page.

Select which style you want and download that template. You can then customise this with your own text and images.
2. Visualise the Type of Fold
The next step is to get your head around the folds, which is especially important if you choose to design a tri-fold leaflet. Here’s a quick rundown of the folding options.
Half Fold
This is a bi fold leaflet and folds in half down the middle like a card giving you two sections to design on each side.

C-Fold
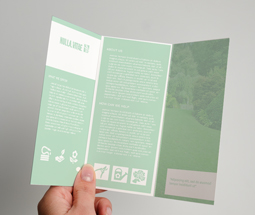
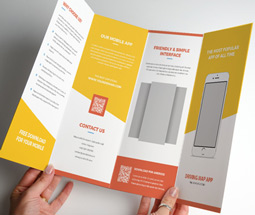
This is a classic tri fold option that has three different sections to design on each side. When folded, it looks like a C.

Z-Fold
As the name suggests, this tri fold leaflet option is shaped like a Z. Like the C-fold, it has six different sections to design – three on the front and three on the back.

For more information, here’s how to set up folded leaflets for print.
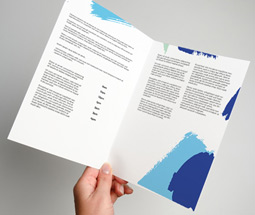
3. Adding Text and Images
Now it’s time for the fun bit – piecing together all of the content in your design!
The easiest way to add text to your flyer design is by using text boxes. To add them:
• Go to Insert > Text Box
• Select the style you want to use then draw the text box on your design
• Type in or copy and paste the text you want to use
• Change the font, size and colour under the Home tab
• Change the text box under the Format tab
For images:
• Go to Insert > Images
• Choose a high resolution image from your Computer
• Double click the image to insert it into your design
• Drag and drop the image to place it
• Use the corner handles to change the image size
4. Save Your Design
Before you upload your brochure design to be printed, the next step is to save it as a PDF.
• Click File > Save As
• Choose a folder on your Computer to save your design
• Name your file and change ‘Save as type’ to PDF

5. Uploading & Proofing Your Artwork
When you’re ready to upload your artwork to be printed online, our proofing tool will automatically add 3mm bleed to the edges of your design. It’ll also produce a ‘proof’ of your artwork which you’ll need to approve before placing your order. The artwork proof shows exactly what your folded flyer will look like when printed. If you’re happy with how your design looks, simply tick ‘approve’ and continue to the basket.
Our in-house team of artworkers will also double check your design before it goes to print using our famous 10 point check - here’s what’s included in our artwork check.
And there you have it – you’ve just designed your own folded leaflet using Microsoft Word! If you need any help setting up your artwork or you’re not sure which fold type would be best for you, get in touch with our team today.
Or, why not design online using our free folded leaflet templates? Each template is designed by our in-house graphic designer so you can create quality print marketing no matter your skills or experience.
Need More Help?
When it comes to getting your head around the different types of folded flyers and leaflets, it sometimes helps to see a visual representation. That’s why we’ve created this handy video which not only shows each fold type we offer at instantprint, but also explains some of the terminology printers often use.
If you’d rather hold the fold types to get a feel for them before you buy, we also include our most popular folded leaflets (C-fold and Z-fold) as part of our free sample pack - order yours here!
Conclusion
Creating a folded leaflet in Microsoft Word can help showcase your business professionally. This article offers valuable tips to design an appealing and informative leaflet that effectively communicates with your audience. Adding creativity and attention to detail can capture readers' attention and motivate them to act. Start designing your leaflet now to see your business grow.