(1) (1).png)
Whether you’re creating your very first flyer for a product launch or designing the slickest of business cards, at some stage in your business development it’s likely that you’re going to encounter a graphic designer. Designers are very helpful people. They can take a so-so concept and make it stunning – but it can be expensive if you don’t properly brief a designer at the start!
Graphic designers are usually freelance, which means they will either charge you by the hour or by the project. If they quote by the hour, adding lots of changes to your design will soon rack up the expenses. On the other hand, if you pay for the project, it’s likely they’ll have set strict parameters for how many changes you can make before extra charges are incurred.
This is because additional time and research is required, and that’s not something that freelancers give away for free! A designer will usually include a few rounds of small revisions – but any total re-imaginings of your original idea will be costed as an entirely new project.
With that in mind, here are some steps to make sure you build a great relationship with your graphic designer, so that you stay on budget and your vision is easily translated to paper!
![]()
What Graphic Designers Won’t Do
Before you hire your graphic designer, be very clear about what they do and don’t do. For some, animation is totally their bag, while others haven’t made one in their entire life. Some enjoy brand creation (logos, banner headers etc), while others prefer being infographic wizards.
Be sure to find a graphic designer who specialises in – or is at least very comfortable with – designing for print media. This is because there are different requirements for print media compared to online content, such as the colour type, the document set-up, and the limitations of the medium.
It’s also worth bearing in mind that your graphic designer is highly unlikely to provide you with any written content. That means any writing you want to be included in your document, whether it’s a business card, a product catalogue, a brochure, or a desk calendar, needs to be supplied to them. This content (or ‘copy’) must be proof-read before being provided to the designer, as most will simply copy and paste from the supplied document – it’s not their job to proof-read!
The Process Of Working With A Graphic Designer
There are many steps to working with a graphic designer, so it’s a good idea to have a map of the process to help guide your way through negotiations.
1. The Brief
The brief is your concept: what you need doing, the ideas you have for it, and when you need it done by. This document should be short enough for a prospective designer to read quickly, but include enough detail for them to determine a fair quote.
Try to include:
- Your timescale expectations
- Your project type (one-off, ongoing, regular retainer)
- Your project intention (product catalogue, event flyer, business card design etc)
- Your expectations (are they only setting out fonts, or creating new illustrations from scratch?)
- Who the designer will report to (choose one point of contact for simplicity)
- All elements you want the designer to work on – don’t just say ‘a business card’ then try to get them to re-size it into a flyer for free!
- Any other pertinent information to the project.
You might want to include examples of the type of illustration or design you’d like – but remember that each graphic designer has their own unique style. It’s not professional to ask a designer to completely imitate someone else’s work – if you want that style, hire that person! However, you can include a ‘mood board’ to show examples of style elements that you feel reflect your brand well. You’re hiring a designer for their creative eye – so let them use it!
Be open and honest about the work you need – otherwise you risk wasting your time, and the designer’s time. If you’re not thorough, you may only realise later on that they don’t have the right skills or experience for everything you need. It also helps them to provide you with a fair quote, including realistic timescales, so you can budget accordingly.
2. The Budget
Speaking of the budget: don’t scrimp. A graphic designer will often have a degree in their chosen field, and will have spent years building up their experience. You’re paying for these specialist skills in order to generate more revenue from customers than if you took a shot at designing something yourself. So, rather than viewing the project as a one-off piece, think about the long-term value it will bring to your company. Designers only get paid once for their work, while you could reap years of financial benefits!
It’s OK to be upfront about your budget, particularly if it’s tight. This will give the designer a fair idea of your expectations and parameters – and help them decide if they want to work for you. A more inexperienced designer might be willing to work for less, on a faster turnaround, but the quality may be lower. It’s up to you to weigh up the pros and cons of spending more on your design budget, but remember to keep negotiations honest and open in order to maintain good working relationships.
3. The Contract
When you’ve found a graphic designer you’d like to work with, set up a contract for the project. Make sure to stipulate terms such as:
- Expected turnaround time
- The number of initial concepts to be drawn up (and what happens if you don’t like any of them)
- How soon feedback will be given to the designer
- Agreed payment rate
- Agreed payment rate for additional revisions or hours beyond the initial project scope
- Agreed payment terms (upfront, on delivery, or 50% upfront and 50% delivery)
- Penalties for either party breaching agreed expectations (such as a percentage increase on the final bill if you delay feedback, or the designer adding interest for late payment).
You may find that your graphic designer already has a standard client contract which you can use, or you could create a bespoke one for the project. If you’re planning on regularly using freelancers, it’s a good idea to have your own template contract that includes standard terms and conditions. These can always be amended on a case-by-case basis as you work with each freelancer to cover their standard terms, too.
4. The Drafts
This is the fun bit! Here, you have a consultation with your graphic designer to share your ideas. They’ll then go away and work on a design concept or two (depending on what options have been set out in the contract) and send you the drafts.
A draft is just that: a draft. You’ll be able to make changes! It’s important that a draft is created, however, as it ensures that your graphic designer has understood your brief, your branding, and your purpose with depth and clarity.
5. The Feedback
Look over the concept drafts carefully, and pick the concept that you feel most reflects your company and branding. At this stage, it’s OK to still want some changes: concepts are created to form the base from which to build, they don’t have to be the finished product. You’ll usually have two rounds of changes or revisions included in your contract.
Make sure that you provide honest feedback to your graphic designer. If you don’t like anything they’ve provided, ask them if there’s any further clarification on the brief that they need, or if they want a further consultation with you. It’s best to do this as early on as possible to avoid problems and expenses down the line.
6. The Revisions

The general, expected, rule when it comes to revisions is that you get one major and one minor revision included in your price. This might be different, depending on the terms you agreed in the contract, but whatever has been agreed, be sure to respect it. As a graphic designer, it’s very easy to experience ‘scope creep’. This involves additional revisions without charge (which results in the designer effectively losing money and feeling negatively about working with you). If you’re not sure whether your revision request is akin to scope creep, see if you posed the question with: “Can you just…?”. This is usually a sure sign that you’re taking advantage of the revision rounds.
To maintain clarity, provide your feedback for each round of revisions on one document. It could be notes taken down in a Word document, or handwritten notes on a printed PDF of the design – however you (and the designer) work best together. Only provide this document once: that’s one round of revisions. Don’t then follow up with several emails that start with: “Oh! And also…” because you’re going to set a precedent for being a client that your designer resents working with.
7. The Approval
Once you’re happy with the design, make sure to circulate it to several people to proof-read. This is not the time to provide more revisions! It is purely to make sure all of the content has been correctly laid out, and that the copy is all spelled correctly. Be sure to check things such as:
- Contact information is correct
- Dates and times are correct
- Brand colours are as they should be
- Any images are free from copyright (or have been purchased, or already owned by you)
- There are no graphics or text that’ll run over a crease, such as on a folded business card
Once you’ve had the OK from your proof-readers, you can sign off the project. Be sure to ask for all design files from your graphic designer, as you may need them at a later date (such as to use a business card template for new employees). Ask if they can export your artwork as a print-ready CMYK PDF and you’re ready to submit your document for print!
The Jargon
A quick word about graphic designers: they handle a lot of jargon on a daily basis. Here’s the non-designer guide to help you understand what they’re on about…

-
Composition
This is how your elements are composed on the page. For example, if you have text and images, the composition will affect where the reader’s eye is drawn to first, so it’s important to make sure the artwork has a suitable layout to highlight the most important point you want to make.
-
Bleed And Safe Zone
This is a technical term which relates to how the artwork document is set-up in design programmes. You need a bleed area and a safe zone, usually 3mm each, around the edge of your document. That’s 3mm extra on the outside of the artwork (the bleed) on which the background image or colour is extended, and 3mm inside that (the safe zone) where no graphics or text should sit, to avoid being cut off. This is because commercial printers don’t just print to the edge of the paper: they print on slightly larger sheets of paper which are trimmed to size after the printing is complete.
If you have anything important in your bleed or safe zones, there’s a chance it could be cut off!
-
CMYK And RGB
These are the most common colour spectrums used by designers. For online work, RGB is most common as this most accurately reflects what you can see through a computer screen. This is because RGB is an additive spectrum, where colours are added to a black background (such as the pixels on your computer monitor). There are thousands more colour options in RGB than in CMYK.
CMYK is most commonly used for print media. It stands for: Cyan, Magenta, Yellow, and Key (Black), which are the four colour inks used to build a printed image on large scale commercial printing presses. CMYK is a subtractive spectrum, meaning colours are used on a white background to filter other colours out of the visual spectrum.
CMYK has a smaller range of colours than RGB. It might seem strange to restrict printing to a smaller colour spectrum than RGB, but in fact it helps to standardise the colours across all printers for a high-quality output.
Remember that when you check the artwork your graphic designer sends over that your office printer probably prints the RGB spectrum (as most desktop printers do). This means the colours may not quite match up to the final printed product, as the artwork your designer has created will be in CMYK.
-
White Space
This is, very literally, the white space on the page. It’s really important for any designer to understand how to use white space effectively, as it can draw the eye where it needs to go, as well as prevent artwork from feeling cluttered.
-
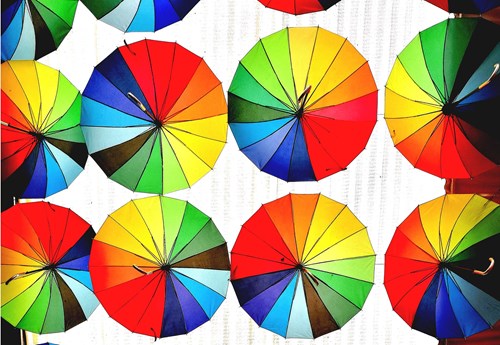
Gradient
A gradient is where one colour fades into another colour. Sometimes it’s very subtle, while other times you might have a rainbow of colours fading into each other. It’s particularly effective on digital designs, but can be done well in print, too. You can read more about gradients in print in our blog here.
-
Typography
This refers to the fonts your graphic designer uses. It covers the, spacing, font, and typesetting of your text, and is an important skill for graphic designers to be confident with in order to produce high-quality work (otherwise you may end up with fantastic images but text which doesn’t seem to ‘fit’ with the style or branding).
-
Resolution and DPI
The resolution of images is really important when designing artwork for print, and your graphic designer knows this. If they ask you for a high-resolution image to include in their artwork, they mean that you need to send them something with a higher resolution that 300dpi.
DPI stands for dots per inch, meaning the number of dots of ink on the paper per inch during printing. So the more dots there are per inch, the higher the resolution will be. This is really important when sending artwork to print, as a low DPI will result in fuzzy final printed images.
If you’re asked to check a proof before sending it to print, a good way to check the resolution is to zoom in to your document by 300 – 400%. This will reflect the quality at which it’ll look once printed on paper.
If You Can’t Afford A Designer (Or Want To Have A Go Yourself)…
While we highly recommend that you use an experienced graphic designer for your printed business stationery, we’re realistic that some businesses – especially startups – are on a shoestring budget. Remember that you can always choose from our design online templates for most of our printed business stationery, where you can customise templates with essential details such as your contact information and company logo.
As soon as your company is up and running, try a graphic designer! The quality of work they can produce will have a significant positive impact on your customers’ perception of your brand, so they’re well worth their weight in gold.