(1).png)
So, you’ve got something you want to shout about. Be it a new product, offer, event, or you just want to cause a buzz around your business and draw as many eyes as possible. Making your own poster can be simpler than you think. This step by step guide comes in two stages; first design and secondly print, so if the creative juices aren’t flowing and you need a little direction to make your own poster, check it out.
Stage 1 - Design
1) Be Specific To Your Target Audience
And no, we don’t mean simply make a pink poster for women and blue one for men. Think about what’s striking to your target audience, and what will catch their eye as they’re walking past.
There’s a science behind what attracts people to posters. If you’re attracting bargain hunters, make the offer the main focus in bright colours. If you’re promoting a sporting event such as a 10K run, make the focus the what, where, and when, and use an inspirational image to pull the viewer in.
When it comes to targeting your audience, consider that:
- Students prefer humorous ads that are unique and creative, according to Marketing Charts.
- Parents will glance at informative posters concentrating on cost and convenience in a simple and direct manner (Business.com).
- Art Lovers are struck by posters that make them think. Clever images, fun fonts and bold themes will lure in the music, film, art and book worms! (How Design)
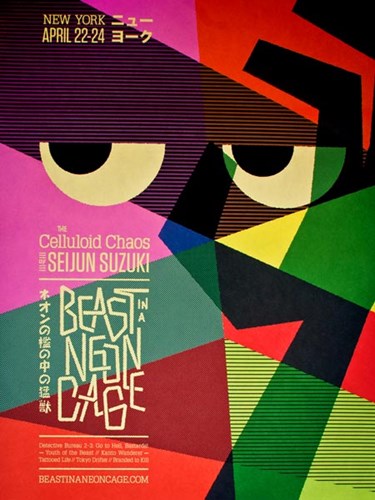
How Design
2) Define Your Message
What’s the purpose of your poster? If it’s to raise awareness for a charity, shocking images that draw emotion from the viewer will create a lasting impression. If it’s to put your brand on the map, make sure your logo, colour scheme and products are the focus.
Posters are seen at a glance so you need to make sure your message is obvious in the few seconds the viewer will give it – the more impactful and easier to process, the more effective!

Yorkshire Times
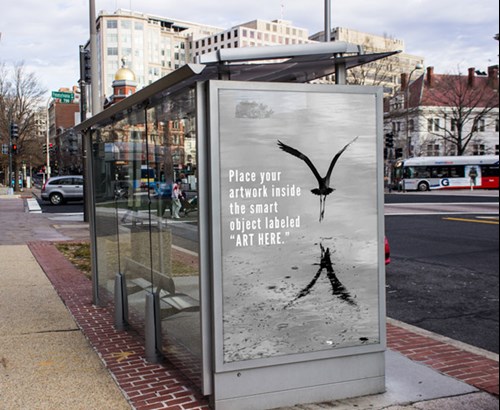
3) Consider Where it Will Be Placed
- Design: How Design swear by the ‘Rule of Fives’, whereby your poster should still have an effect regardless of if the viewer is standing 5 feet or 50 feet away. To do this, make sure your message can be summed up by a captivating image or text that’s large enough to be seen from a distance, and don’t forget to include additional details at a smaller size for those who are in arm’s distance.
You’ll also need to consider the colour of the wall or other background where your poster will be going – brighter colours will stand out on white walls, simple designs on brick walls and so on.
- Size: Consider the distance from which your poster will be seen by a viewer, and how much information you need to convey. If you’ve got limited space indoors, A3 size might be for you; however for larger, outdoor placements that really stands out, you can print up to 60 x 40 size.
- Use: Where will you be placing your poster? How long do you need the poster to last? For temporary indoor posters, you’ll be able to get away with a thinner stock. If you need it to last a little longer, or you’re using it outside, try a waterproof PVC option.
Spoongraphics
4) Include the Details
Although fabulous imagery and clever titles are a fun approach when making a poster, remember to include all the required information. For events, the time, location and dates are a must.
Posters promoting new products should always get across their benefits and where to buy them. Adding your business phone number, website or shop location is always a bonus so people know where to find you if they want to know more.
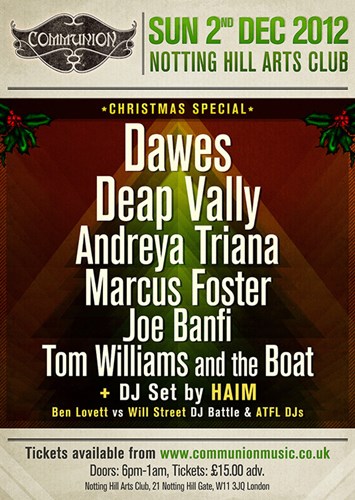
Creative Bloq
5) Stick to Your Brand
Make sure the colour scheme and wording of your poster are true to your brand. It will help people associate the message directly to your business, and will ensure that they remember you after they’ve walked past. Make sure to add your logo and social media handles to your poster design to make you more recognisable.
Stage 2 – Print
6) RGB or CMYK?
When submitting your poster artwork, make sure it’s in the CMYK colour format so when we print your poster, the colours will be perfect. If you use RGB, the colours won’t be printed as you expect and you’ll lose the effectiveness of your carefully designed poster! You can check the colour format by going to file > document colour mode.
If you’re using our free poster templates to make a design at the click of a button, don’t worry – they’re automatically set in the right “colour space” which is CMYK.
7) Use High Resolution Imagery
Nothing looks more unprofessional than a pixilated image. When you make your own posters in large sizes it’s essential to make sure your image is both high quality and BIG to avoid a blurry picture.

Buzzfeed.com
8) Consider Bleed
‘Bleed’ is a 3 or 5mm edge around your poster design which ensures part of your poster isn’t cropped off. Again, our poster design tool will take this into consideration for you but remember to include it when submitting your artwork to avoid white lines on the edge of your poster.
So, there you have it – your step-by-step guide on how to create a poster! If you need any more help or if you have any questions about poster printing, don’t hesitate to get in touch with our team. They’re always happy to show you the ropes, no matter what stage you’re at. Or if you’re raring to go, why not make a head start with our free online poster maker, and pick from a range of eye catching custom poster templates.